

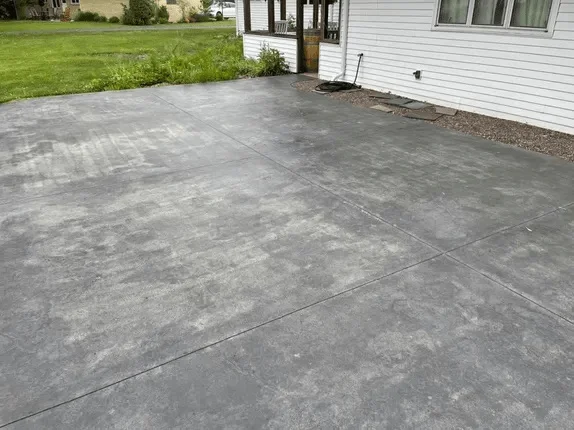
Surface prep is the part people don’t see, but it’s the part that decides how the floor performs
When people picture an epoxy floor, they usually picture the finished surface: clean lines, consistent color, a decorative flake pattern, or a glossy coat that makes the space feel finished. What’s easy to miss is that the visible coating is only as good as what it’s bonded to.
In the epoxy floor installation process, surface preparation is the make-or-break stage because it controls two things that matter more than anything else: adhesion and uniformity. Adhesion is what keeps the system bonded to the concrete through day-to-day traffic. Uniformity is what keeps the coating looking even—without random dull spots, fisheyes, peeling edges, or sections that wear faster than others.
This article focuses on what “surface prep” actually means in practical terms—what contractors are trying to accomplish, the typical steps involved, and why certain concrete conditions demand extra work before any coating goes down.
What surface prep is trying to accomplish
Surface prep isn’t just “cleaning the slab.” A proper prep phase is designed to deliver a few specific outcomes:
- Remove surface contamination (oil, grease, tire plasticizers, old sealers, curing compounds, paint overspray, drywall mud, cleaning residues)
- Create a concrete surface texture that coatings can bond to (often called a profile)
- Identify and address weak concrete near the surface (spalling, laitance, soft top layer)
- Repair or treat defects that can telegraph through the coating (cracks, pitting, uneven patches)
- Control moisture-related risks that can compromise the bond
If those outcomes aren’t met, the coating may still look good on day one—but the floor is more likely to develop issues later, especially in high-traffic paths.
The first step is always diagnosis, even if it’s quick
Before equipment touches the slab, a prep plan starts with a quick read of the concrete. Typical items that influence prep choices include:
- Age of the slab (newer concrete can hold more construction residues; older slabs can have deep oil staining)
- Signs of sealers or previous coatings (water beading, inconsistent absorption, visible film)
- Tire marks and oil spots, especially near garage doors and parking areas
- Cracks and joints (and whether they’re dormant or still moving)
- Moisture signs (efflorescence, damp edges, past moisture events, musty smell)
The goal is to avoid guessing. Concrete varies from home to home and building to building, even in the same neighborhood.
Degreasing and deep cleaning is about removing what grinding can smear
A common misconception is that grinding “takes care of everything.” Grinding is important, but heavy oil contamination can be driven into the surface if it’s not treated first.
In garages, shops, and maintenance areas, prep often begins with targeted cleaning:
- Degreaser application to break down oils
- Agitation (scrubbing) to lift contaminants
- Rinsing and removal so residue isn’t left behind
- Drying time so the slab is ready for mechanical prep
This stage matters most in parking zones and around tool benches, where oils and chemical drips are more common. If oils remain, they can interfere with bond strength or cause visible surface defects in the coating.
Why mechanical profiling is the core of prep
Most epoxy systems rely on mechanical prep because coatings need to bite into concrete that has the right texture. This texture is not random roughness—it’s a controlled profile.
Two common profiling methods are:
- Diamond grinding
- Shot blasting
Both aim to remove weak material and open the concrete surface so the coating can lock in. In practical terms, profiling is about creating a surface that is:
- Clean, bare concrete (no film, no paint, no sealer)
- Evenly textured across the area
- Free of glossy patches that signal contamination or remaining coating
Grinding: what it does well
Grinding is common for residential garages and many interior slabs. It can:
- Remove thin coatings and surface residue
- Level small imperfections
- Open pores for better mechanical bond
- Feather edges and detail areas near walls
A good grind typically leaves a uniform, slightly textured appearance, not polished concrete. If parts of the slab still look slick or glazed afterward, that’s a flag that the surface may still have something on it.
Shot blasting: where it fits
Shot blasting is often used in heavier commercial settings or where a very consistent profile is needed across large areas. It can:
- Create a uniform texture quickly
- Remove weak surface paste
- Reach large square footage efficiently
- Improve consistency when the slab has variable hardness
The point isn’t which method is “best” in a vacuum. The point is that the prep method has to match the slab condition and the coating system being installed.
Dealing with old coatings, paint, and sealers
One of the most time-consuming prep scenarios is a slab with unknown history. Common examples:
- A garage floor that was previously painted
- A slab that had an acrylic sealer
- A space that had old adhesive residue from flooring
- A DIY coating that partially failed and left patches behind
In these cases, prep is about full removal—not “making it look scuffed.” Coatings and sealers can block absorption and prevent a dependable bond.
Typical approaches include:
- Heavier grinding passes until clean concrete is exposed
- Additional edge work where old material collects
- Spot checks for remaining film (the slab should look consistent across the field)
The key here is consistency. Patchy removal leads to patchy performance.
Cracks and joints: what prep can and can’t do
Concrete moves. Even when it looks stable, slabs expand and contract with temperature and moisture changes. That’s why cracks and joints are treated as their own category during prep.
Hairline cracks vs structural movement
Hairline cracks can often be repaired in a way that reduces how much they show in the finished coating. Wider cracks, settled cracks, or active movement cracks need a different mindset: you can improve appearance, but movement may still telegraph over time.
Control joints and expansion joints
Joints exist for a reason. They manage movement. In many coating projects:
- Joints may be honored (left as joints)
- Or they may be filled depending on the environment and expectations
There isn’t a universal “right answer.” What matters is understanding that joints behave differently than cracks in the field of the slab, and they often deserve separate detailing.
Why joint edges matter
Even if the joint itself is handled correctly, the edges around joints can be weak—chipped, spalled, or uneven. Prep commonly includes repairing those edges because they’re high-stress zones for tires, carts, and foot traffic.
Pitting, spalling, and surface defects
Many slabs look “fine” until they’re ground. Then pitting and pop-outs become visible. These defects matter because coatings mirror what’s below them.
During prep, crews typically address:
- Spalls (broken or missing chunks of concrete)
- Pits and pinholes (small voids that can show through)
- Pop-outs (small cones missing from the surface)
- Uneven patches from past repairs
Repairs are usually done with compatible patch materials so the final coating sits on a stable, uniform base.
Moisture: the invisible variable that can change everything
Moisture is one of the most common reasons coatings fail prematurely. The tricky part is that concrete can look dry and still transmit moisture vapor.
Moisture-related issues can show up as:
- Blistering
- Bubbling
- Clouding under clear coats
- Loss of bond in sections
Because of that, the epoxy floor installation process often includes moisture awareness during prep—especially in basements, ground-level slabs, and older buildings.
Where moisture tends to show up
- Along perimeter walls
- Near floor drains or plumbing penetrations
- In low spots where water sat in the past
- Under mats, storage, or old flooring where air didn’t circulate
A responsible prep plan accounts for what the slab is showing, rather than assuming all concrete behaves the same.
Edges, corners, and “detail work” zones
A lot of the visible quality of an epoxy floor comes from areas people don’t think about:
- Perimeters near walls
- Around columns
- At door thresholds
- At steps or transitions
- Inside tight corners where machines don’t reach easily
These areas often require hand grinding and extra attention. If they’re not prepped to the same standard as the main field, the coating can look inconsistent near edges, or adhesion can be weaker where traffic catches corners.
Dust control is part of surface prep, not an afterthought
Grinding and blasting create dust. Dust is more than a nuisance—it can become a coating defect if it ends up in wet material.
Prep typically includes:
- Industrial vacuums attached to grinders
- Thorough vacuuming after profiling
- Wipe-downs or tack methods as needed
- Keeping doors and airflow managed so dust doesn’t swirl back onto the slab
Cleanliness at this stage is what keeps the coating surface from ending up with grit locked into the finish.
How crews verify the slab is ready before coating
Good prep isn’t just effort; it’s verifiable. Common signs the surface is ready include:
- Uniform appearance across the slab (no glossy islands, no remaining paint patches)
- Consistent texture
- No visible dust film after final vacuuming
- Repairs that are flush and properly cured
- Clean transitions and edges
At a simple level, the slab should look like clean, bare, intentionally textured concrete, not “concrete that got scuffed.”
Why prep affects appearance as much as durability
Surface prep is often explained as an adhesion issue. That’s true, but prep also drives the look of the finished floor.
Prep influences:
- Color consistency (contamination can cause blotching)
- Gloss consistency (variable absorption can lead to uneven sheen)
- Surface smoothness (pits and chatter marks can telegraph)
- How decorative elements sit (flake lays more evenly on a consistent base)
That’s why two floors using the same coating materials can look very different—prep quality shows up in the final result.
What “rushing prep” usually looks like later
This is where surface prep stops being theory and becomes visible. When prep is incomplete, the most common long-term issues tend to show up as:
- Peeling at edges or in hot-tire parking zones
- Isolated sections that chip under impact
- Areas that look dull or cloudy compared to the rest
- Random fisheyes or craters in the finish from contamination
- Premature wear in turning zones
Not every issue appears immediately. Some show up after months of normal use because traffic finds the weak points.
A practical closing thought on surface prep
If you only remember one thing about the epoxy floor installation process, it should be this: surface prep is not a single step—it’s a sequence of actions that turns a variable slab into a dependable base. Concrete can hide contamination, moisture behavior, weak surface paste, and old coatings that interfere with bond. Prep is how installers remove that uncertainty.
When surface prep is done thoroughly—cleaning, profiling, detailing edges, addressing cracks and defects, and keeping the slab clean before coating—the rest of the system has a fair shot at performing the way people expect: consistent appearance, stable adhesion, and predictable wear under real traffic.